
What is Ansible?
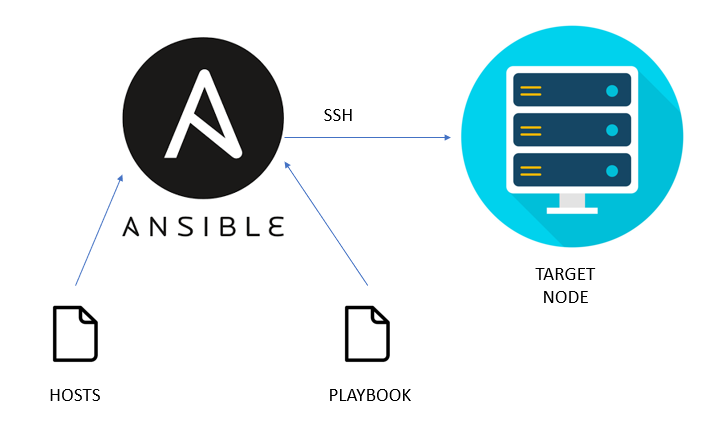
Ansible is a simple automation and configuration management platform that makes it easy to push config to all your servers. Ansible uses the SSH protocol so it doesn’t rely on any agents. This makes it very easy to configure and crossplatform for Linux and Windows. Perfect for your Homelab!
Installing Ansible
Ansible can be installed on multiple distro’s of Linux. For this example I will be showing how to install it on Ubuntu 20.04 LTS.
First update your Ubuntu installation:
sudo apt update && sudo apt upgrade
sudo reboot
Next install Ansible via apt:
sudo apt install ansibleCreating your inventory file
When you use Ansible you need to setup a couple of things. Firstly a file containing information about the hosts you want to manage. This is called the Inventory:
sudo nano /etc/ansible/hostsIn this file you will declare information about your hosts you want to manage with Ansible. This can be an ip adres, host or fqdn. In this example i have split up the hosts in multiple groups with variables that are assigned to groups. These group names can be used later in Playbooks. Example inventory file:
[linux]

[linux:children]
ubuntu

[ubuntu]
ubuntuhost01
ubuntuhost02
ubuntuhost03
ubuntuhost04
ubuntuhost05

[linux:vars]
ansible_python_interpreter=/usr/bin/python3
ansible_connection=ssh
ansible_user=ansible
ansible_become=yes
ansible_become_method=sudo

[windows]
windowshost01
windowshost02
windowshost03

[windows:vars]
ansible_connection=ssh
ansible_user=administrator@ad.domain.tld
ansible_shell_type=cmd
The example above has a couple of groups and variables. It starts with declaring [linux] servers. It then definies the childeren of [linux] servers via [linux:children]. In this example [ubuntu] with the hosts ubuntuhost01 through ubuntuhost05. Attached to [linux] are a couple of variables via [linux:vars].
[linux:vars]
# This defines the python interpreter used for all linux servers.
ansible_python_interpreter=/usr/bin/pytho

# Defines to use ssh for the connection to the host.
ansible_connection=ssh

# Defines the user that is being used for the connection to the host.
ansible_user=ansible

# Define Ansible to elevate to root account.
ansible_become=yes

# Define to use the sudo method to elevate to root.
ansible_become_method=sudo
After creating your inventory file. You can test the Ansible connection with the ping command:
ansible all -m pingFor more examples and options for inventory files. Have a look at the Ansible documentation at https://docs.ansible.com/ansible/latest/user_guide/intro_inventory.html
Connecting to Windows hosts via SSH
As you may have noticed in the [windows:vars] section i have defined a couple of variables for Windows hosts. Starting with declaring to use the SSH protocol. To be able to use SSH on Windows we need to first prepare Windows to allow SSH connection. This can be done as followed:
# Install the OpenSSH Server.
Add-WindowsCapability -Online -Name OpenSSH.Server~~~~0.0.1.0

# Start the sshd service.
Start-Service sshd

# Setting the sshd service to startup automaticly.
Set-Service -Name sshd -StartupType 'Automatic'

# Confirm the Firewall rule is configured. It should be created automatically by setup.
Get-NetFirewallRule -Name *ssh*

# There should be a firewall rule named "OpenSSH-Server-In-TCP", which should be enabled.

# If the firewall does not exist, create one.
New-NetFirewallRule -Name sshd -DisplayName 'OpenSSH Server (sshd)' -Enabled True -Direction Inbound -Protocol TCP -Action Allow -LocalPort 22
You should now be able to connect to your Windows host via SSH.
Ansible Playbooks
Pushing configuration via Ansible to hosts defined in your inventory file is done via Playbooks. Playbooks are YAML files declaring what Ansible should do on the target hosts.
Running playbooks with Ansible is very straightforward. The most basic command is this:
ansible-playbook playbook.ymlThis command runs Ansible with the playbook playbook.yml against the default inventory file we created earlier in /etc/ansible/hosts.
For more indepth options about the ansible-playbook command have a look at the documentation at https://docs.ansible.com/ansible/latest/cli/ansible-playbook.html
Playbook to update Linux servers
Now on to the main task updating your servers with Ansible. We are going to start with the Linux servers. As stated earlier Ansible uses playsbook for defining tasks. So we need to start building out a playbook that sets up a connection to the host, run apt update, run apt upgrade and reboot if needed. For these tasks i use the playbook below.
---
 - hosts: ubuntu
   gather_facts: true
   tasks:
   - name: Check and update
     block:
       - name: Install all updates
         apt:
             update_cache: yes
             upgrade: dist
             autoremove: yes
             autoclean: yes
         register: update_results
       - name: Update results
         debug:
             msg: "Update results: {{ update_results.stdout_lines }}"
       - name: Reboot system if required
         shell: shutdown -r now 'Rebooting to complete system upgrade'
         args:
             removes: /var/run/reboot-required
       - name: Wait for system to become reachable again
         wait_for_connection:
             delay: 60
             timeout: 300
Ansible has loads of predefined commands you can use to build up your playsbook. In this example i am using the buildin apt module. The playbook is really straight forward. First it runs the apt command with the options update_cache, upgrade, autoremove and autoclean. It then registers the results in the variable update_results. It then messages the results to the prompt. After that i checks if the updates require a reboot and performs the reboot if needed.
Playbook to update Windows servers
As stated above Ansible has loads of buildin modules readily available for you to use in your playbooks. This also counts for updating Windows servers. For this i use the following playbook.
---
 - hosts: windows
   gather_facts: true
   tasks:
   - name: Windows updates
     block:
       - name: Install Windows updates
         win_updates:
           category_names:
            - CriticalUpdates
            - SecurityUpdates
            - UpdateRollups
            - Updates
            - DefinitionUpdates
           reboot: yes
           log_path:  C:/ansible_windows_updates.log
         register: update_results
       - name: Update results
         debug:
           msg: "Update results: {{ update_results }}"
Like the Linux update playbook this Windows update playbook is really straight forward. It uses the win_updates module with the specified categories. It then reboots the servers if needed and appends the logs to the ansible_windows_updates.log file and reports the results to the prompt.
Conclusion
You should now have a basic understanding about using Ansible to perform updates on your Linux and Windows servers in your homelab. Ansible is a very powerful tool that offers loads of options. For more playbook examples have a look at my GitHub page at https://github.com/tizutech

[…] https://tizutech.com/updating-your-homelab-with-ansible/ […]
[…] operating system we need to make sure the server is reachable by Ansible. My previous post about Updating your Homelab with Ansible has everything explained to setup your Ansible inventory file. Put the hostname of the new Linux […]
Hi, thanks for your post, it was good to see how I can perhaps use Ansible in my own home lab as well. I’ve been working through Jeff Geerling’s guide on Ansible for DevOps. I’ve gotten my head around how I can use Ansible to update my servers and to help in completing ad-hoc commands. But, haven’t quite worked out how I can set playbook’s to build – say a new replacement server for my network – and built it the way I want – Have you created any Play’s that like include other roles etc from say – Ansible-Galaxy etc? One of the things I’m conscious of is, I don’t want to re-write the wheel if I know I can include roles from other projects to make mine work – Hopefully that’s making sense. How you got any more play’s you can push to Github?
Hi Nicksweb,
I’ll try to make a post soon about my Ansible bootstrap script for deploying new VM’s. I’ll also upload it to GitHub when it’s ready.
https://github.com/TiZuTech/ansible-homelab/tree/main/playbooks
I uploaded my bootstrap Ansible scripts and made a post about the boostrapping: https://tizutech.com/bootstrap-your-linux-server-with-ansible/
Awesome, thanks so much for sharing! PS, I’m a bit late to respond but came back eventually – I don’t think I got a notification for your reply.