

Introduction on optimizing Linux virtual machine on Hyper-V
Historically on the internet people said running Linux on Hyper-V isn’t the best choice and you should choose another hypervisor. In the last couple of years Microsoft improved Hyper-V alot since the Windows 2008R2 days. The modern version of Hyper-V is fully optimized for running Linux virtual machines. The differences with the other mainstream hypervisors like VMware ESXi, Proxmox or bare metal KVM are neglectable.
In this blog post we will go over the multiple settings for optimizing Linux virtual machine on Hyper-V. Starting with the creation of the Hyper-V virtual machine.
Hyper-V virtual machine creation configuration
Choosing the correct settings when creating your Linux virtual machine is important. Some of these settings cannot be change after creation.
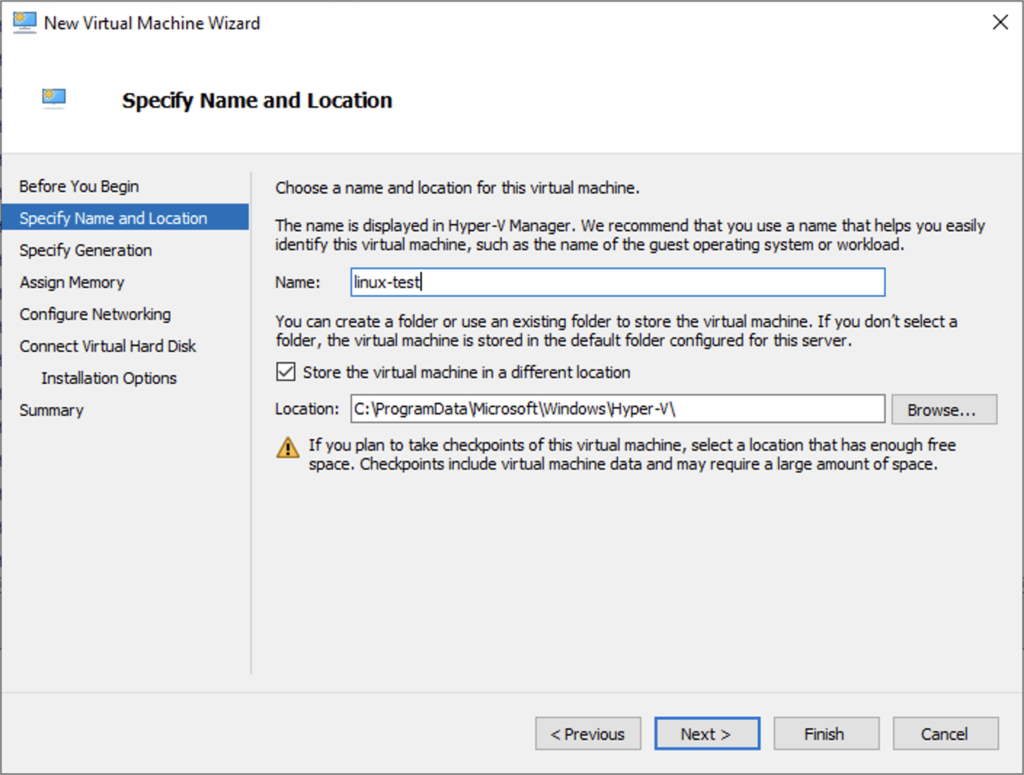
Specify Name and Location
When starting the “New Virtual Machine” wizard you must first choose the virtual machine name and location. The name ofcourse is up to you to choose. Choose something recognisable that defines the virtual machine role. For the location choose the storage you setup in your Hyper-V environment. Make sure the location has sufficient performance.
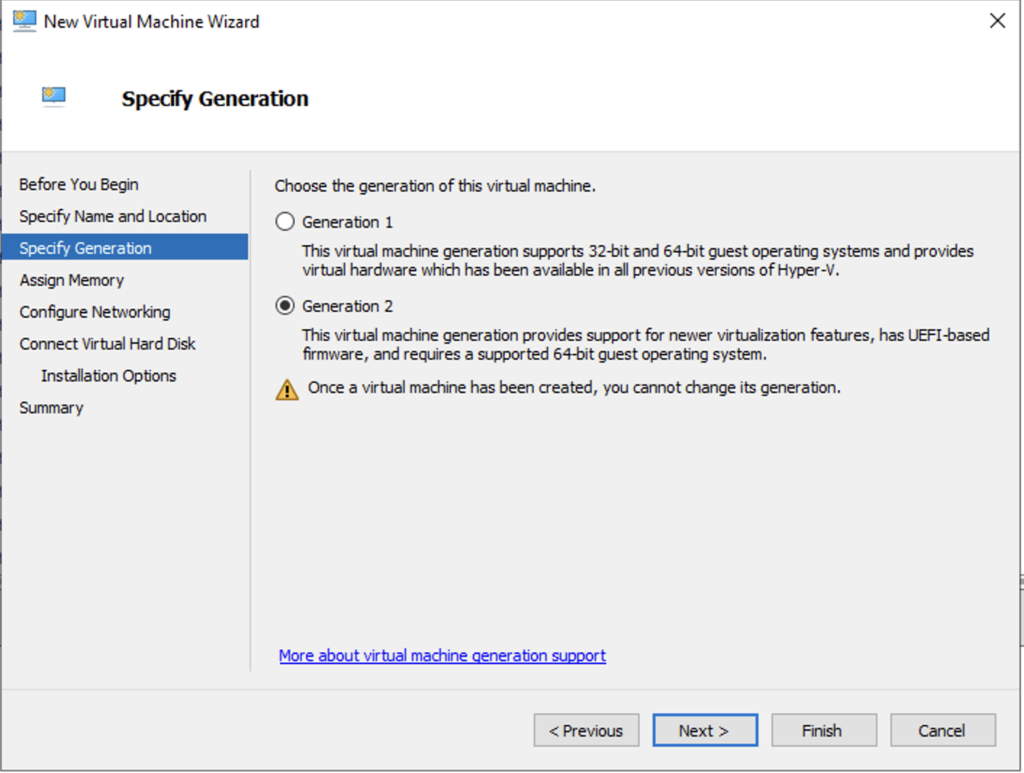
Specify Generation
On the Specify Generation tab it’s crucial to choose the “Generation 2” option. Generation 2 Hyper-V virtual machines have alot of benefits over Generation 1 Hyper-V virtual machines. All modern Linux operating systems for example Ubuntu 22.04 LTS are compatible with the Generation 2 settings.
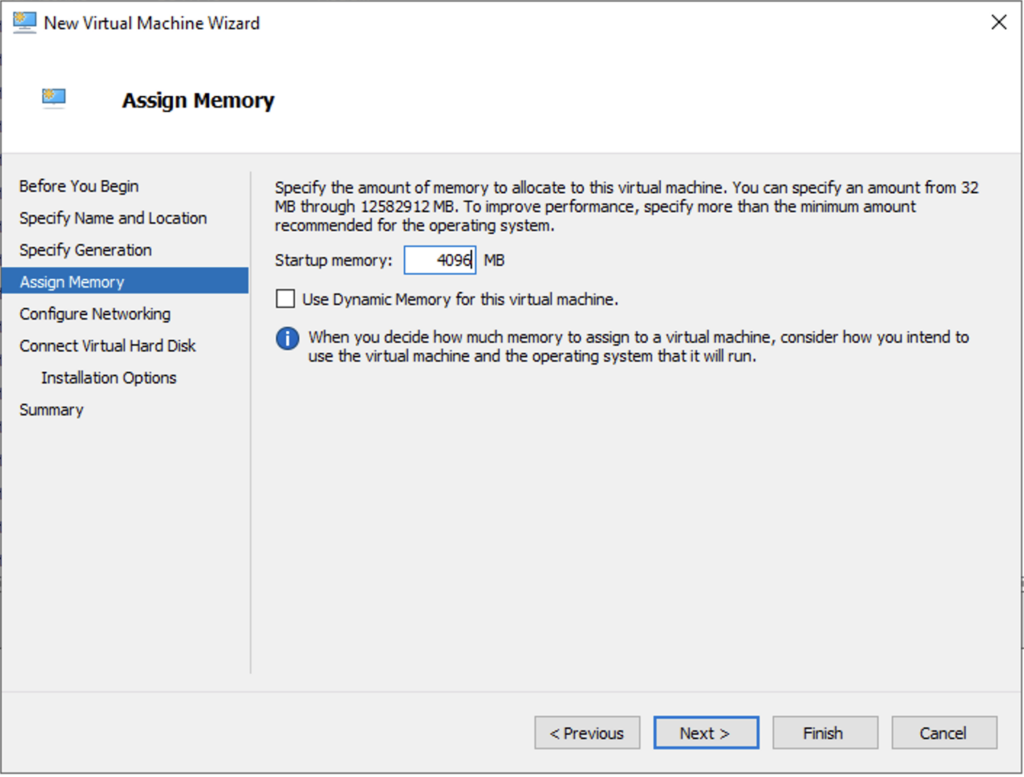
Assign Memory
On the Assign Memory page you can specify the total maximum amount of memory that can be used by the Hyper-V virtual machine. Choose a multiply of 1024 MB Startup memory. For example 2048 MB or 4096 MB. Read the application requirements for the needed amount. Don’t too much about this setting. The Startup memory can easily be changed later if needed. For perfomance it’s best to not enable the setting: “Use Dynamic Memory for this virtual machine.”.
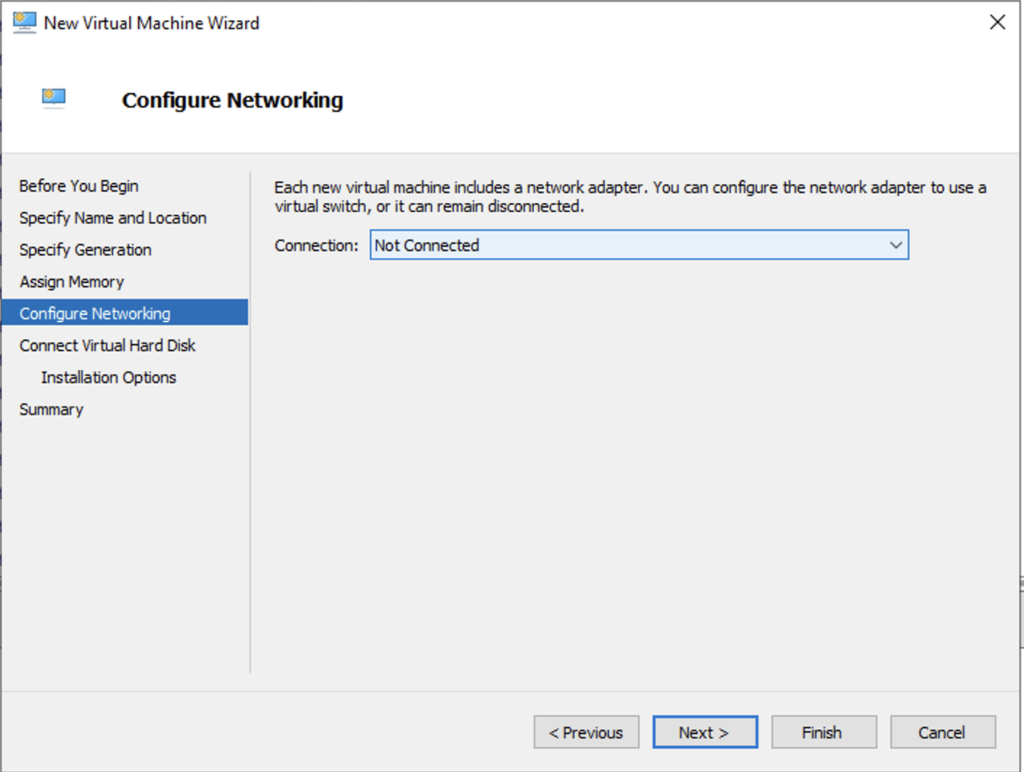
Configure Networking
Now we need to choose the network connection for the Hyper-V Linux virtual machine. You should choose the correct Hyper-V vSwitch thats connected to the network that provides an internet connection.
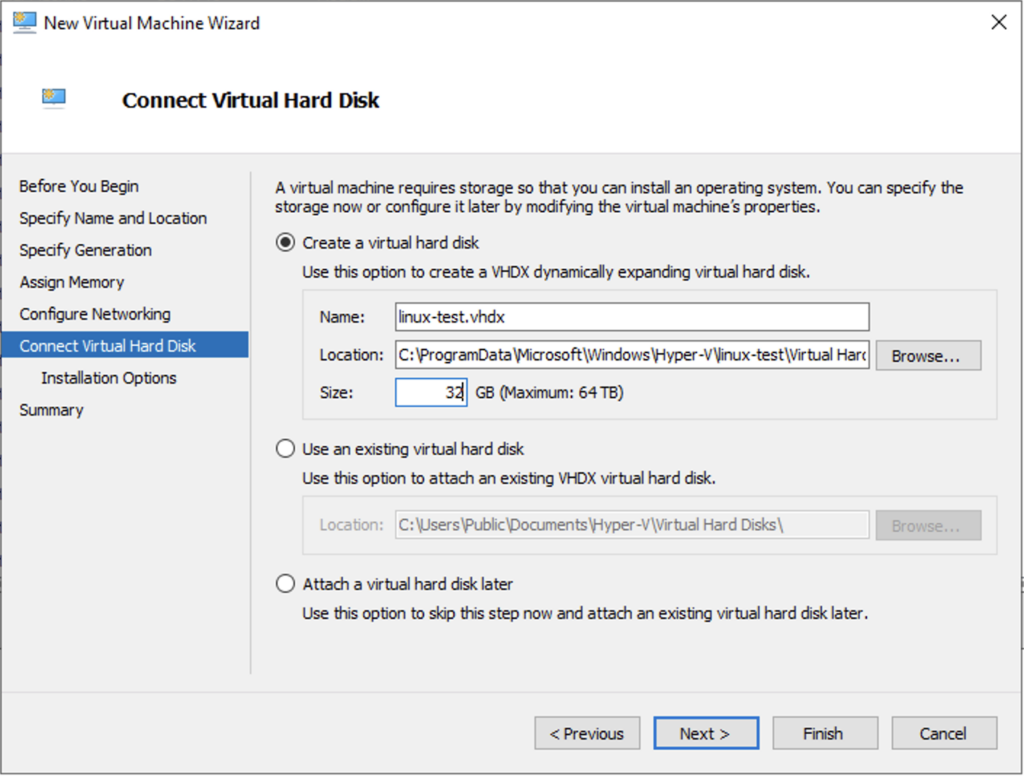
Connect Virtual Hard Disk
Next on the Connect Virtual Hard Disk we need to choose the location and size of the .vhdx virtual hard disk. The location should be a subfolder of the location we choose earlier on the “Specify Name and Location” tab. Then choose the correct size of the virtual hard disk. The default setting is 127 GB which could be too big for most Linux deployments. This doesn’t have any impact on performance but could be a waste of storage.
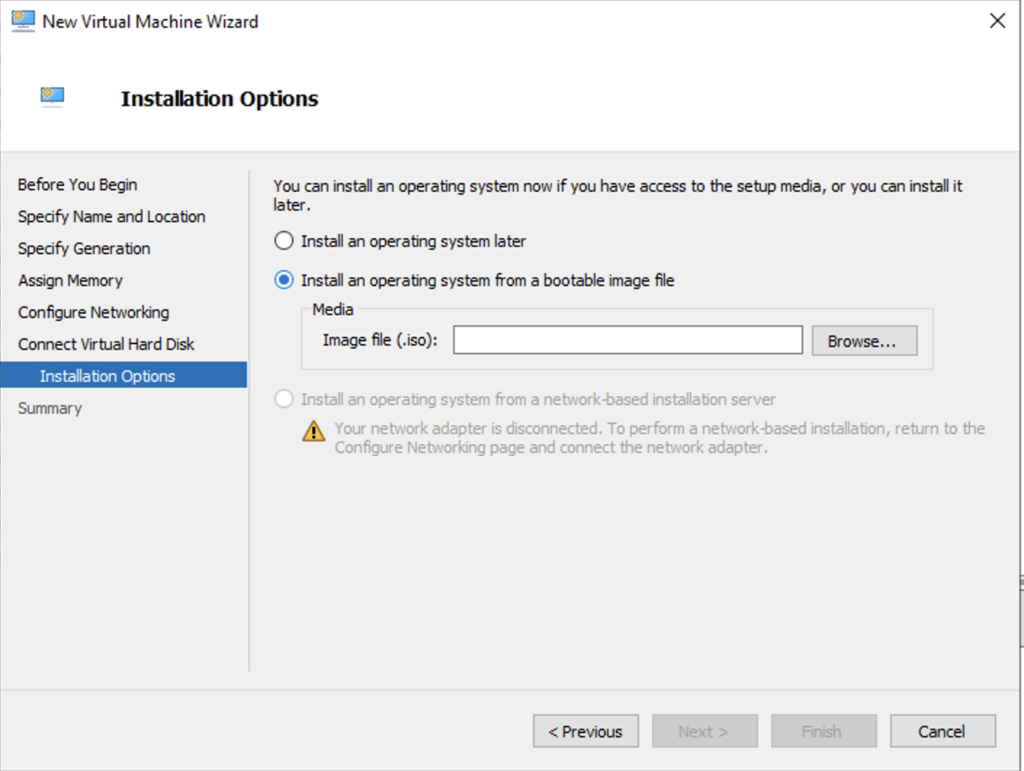
Installation Options
On the next page we can choose the installation media of the desired Linux operating system. For example Ubuntu 22.04 LTS which recently released and provides Long Term Support.
Finish the creation of the Hyper-V Linux virtual machine.
Additional Hyper-V Virtual Machine settings
Before we start up the virtual machine and follow the installation of the Linux operating system we need to change a couple of settings.
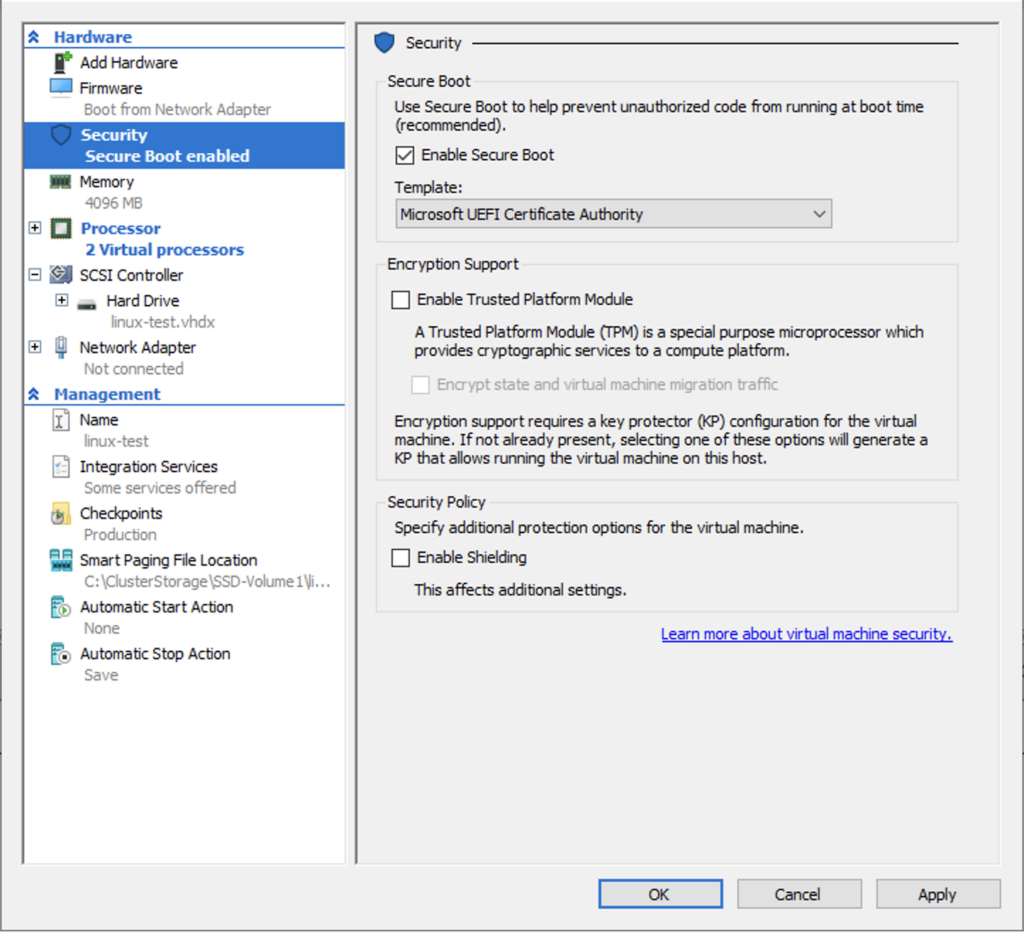
Secure Boot
Hyper-V supports the Secure Boot setting with modern Linux operating systems. To make it compatible we need to change the template from “Microsoft Windows” to “Microsoft UEFI Certificate Authority”.
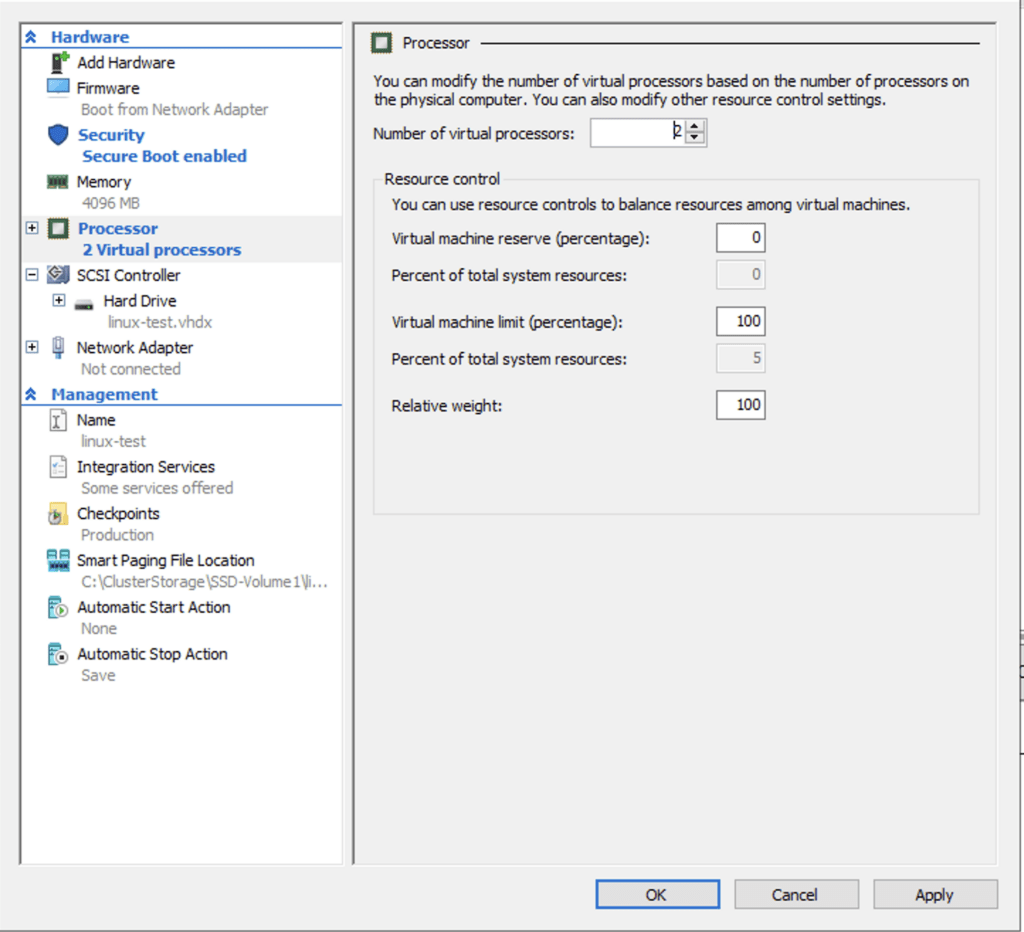
Processor
The next setting I recommend changing is the number of virtual processors. The default setting is 1 virtual processor. Modern hardware should have enough physical processor performance to atleast change this to 2 virtual processors. This significantly improves the Linux operating system installation time and doubles the processor performance of your virtual machine.
Linux operating system
The Hyper-V virtual machine configuration is optimised. Now we should proceed with the Linux operating system installation. Follow the installation guide, reboot and update your Linux operating system to get the most recent updates.
The Azure optimised Linux kernel
To optimise the performance and integration of your Linux virtual machine on Hyper-V you should install the Azure optimised Linux kernel. This kernel provides all the necessary drivers and software needed for the Hyper-V guest integration services. The linux-azure kernel also provides performance boosts by using optimised drivers.
Installing linux-azure on Ubuntu or Debian based system
# Update your Ubuntu installation
apt update && apt upgrade

# Install the linux-azure kernel
apt install linux-azure
After installing reboot your Linux installation to boot with the newly installed and optimised kernel.
Have a look at my article about Installing Hyper-V Linux Integration Services (LIS) with Ansible to get some tips to deploy this with Ansible.
Conclusion
You should now have an optimised Linux virtual machine on Hyper-V with all the guest integrations enabled and extra security with Secure Boot enabled. You should still fine tune the processor and memory settings as needed. Start low increase when you notice the performance is lacking. If you have any more tips or tricks leave them down in the comments below!